
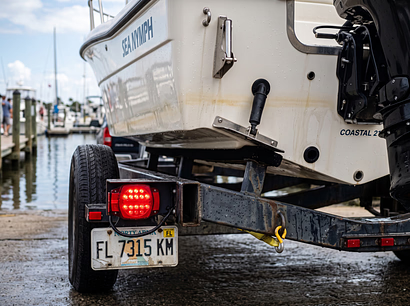
Trailer lights lead a hard life. They get backed into the water, dunked, pulled out and then asked to work reliably in highway traffic. It is no surprise they are one of the most common failure points on a boat trailer, and it is almost always down to water, corrosion or a bad ground. This guide covers what the law requires, the real difference between LED and submersible lights, how the wiring works and how to stop saltwater from ruining your lights every season.
What the Law Requires
Trailer lighting on public roads is governed by federal motor vehicle safety standards, and the requirements are about being seen and understood by other drivers. At a minimum, a boat trailer needs the following, mounted securely on a rigid part of the frame:
-
Tail lights and brake lights, shown in red, so drivers behind you see you and know when you are slowing.
-
Turn signals, so your intentions are clear at junctions.
-
A white license plate light.
-
Red reflectors at the rear and side marker lights, amber toward the front and red toward the rear, with matching reflectors.
Two thresholds add requirements. A trailer 80 inches or wider also needs clearance lights and a rear identification cluster, though boat trailers get an allowance to place a combined clearance lamp near the midpoint of each side. And a trailer 30 feet or longer needs intermediate side marker lights. Complete kits for both narrow and wide trailers are available in the trailer lights collection, which we link below.
LED vs Submersible: What the Terms Really Mean
These two words get used interchangeably, but they describe different things, and understanding the difference will save you money.
Submersible describes how well a light is sealed. A truly submersible light is built to be fully immersed in water repeatedly without letting moisture in. That is different from a light merely labeled waterproof or weather resistant, which usually means it can handle rain and splashing but not a dunk at the ramp. For a boat trailer, submersible is the standard you want.

LED describes the light source. An LED has no hot filament, so it is not damaged by the thermal shock of a hot lamp hitting cold water, which is exactly what cracks traditional incandescent bulbs at the ramp. LEDs also draw less power, come on instantly and last far longer. Put the two together, a sealed LED light, and you get the most durable trailer lighting for saltwater use. It also lets you skip the old ritual of unplugging the lights before backing in, which owners of hot incandescent lights had to do to avoid cracking a bulb.
Beyond durability, LED trailer lights come on instantly and burn brighter, which gives the driver behind you a fraction more warning when you brake. They also draw so little current that they are gentle on the tow vehicle wiring and connector. For a trailer that spends its life being dunked in water and parked in the sun, sealed LED is simply the most reliable choice available, and the small price difference over old incandescent lights pays for itself the first time you avoid a roadside failure.
When it is time to replace, sealed LED kits and individual lamps are in the trailer lights collection, with side markers and clearance lamps in marker lights and buoys.
Understanding Your Wiring
Most boat trailers use a simple flat connector, and knowing which wire does what makes troubleshooting far easier. The four-pin flat connector is the standard for basic trailers, and its color code is consistent.
|
Wire color |
Function |
|---|---|
|
White |
Ground |
|
Brown |
Tail, running and marker lights |
|
Yellow |
Left turn signal and brake |
|
Green |
Right turn signal and brake |
Larger or braked trailers step up to five-pin and seven-pin connectors. A five-pin adds a wire for reverse lights or a hydraulic brake lockout, while a seven-pin adds circuits for electric brakes, backup lights and 12-volt auxiliary power. Connector styles vary, so always match the trailer connector to your tow vehicle. For clean, corrosion-resistant connections that survive the ramp, our guide to basic boat wiring and troubleshooting applies just as well to a trailer as it does to a boat.
|
Connector |
Circuits it adds |
|---|---|
|
4-pin flat |
Ground, tail and marker lights, left turn and brake, right turn and brake |
|
5-pin flat |
Adds reverse lights or a hydraulic brake lockout |
|
7-pin round or blade |
Adds electric brakes, backup lights and 12-volt auxiliary power |
If your trailer and tow vehicle use different connectors, inexpensive adapters bridge the two, but make sure every circuit you need actually passes through. A trailer with surge or electric brakes, for example, needs a connector that carries the brake signal.
How to Replace a Trailer Light, Step by Step

Swapping a failed light for a sealed LED unit is a straightforward job. Start by disconnecting the trailer from the tow vehicle so nothing is live. Remove the old light, noting how it was mounted and wired, and free its wiring back to the nearest connection. Choose a replacement that matches the position and function of the old one, a submersible LED for saltwater duty, and offer it up to check the fit before you wire it.
Connect the new light following the color code, matching brown to the running lights and yellow or green to the turn and brake circuits, and join the white wire to clean, bare metal on the frame for the ground. Use heat-shrink connectors or seal the joints so water cannot creep in, route the wiring so it drains rather than trapping water, and secure it clear of the road and the launch. Reconnect and test every function before you tow. Sealed LED lights and complete kits are in the trailer lights collection.
Troubleshooting, Step by Step
When something stops working, a quick logical check finds the fault faster than replacing parts at random.
-
All lights dead: suspect the connector, the ground or a blown fuse in the tow vehicle. Check the plug for corrosion and the ground first.
-
One function out, such as the left turn signal on both the trailer and the vehicle: look at that circuit's wire and the lamp for that function.
-
Brake lights work but turn signals do not, or the reverse: check the specific circuit wire, yellow or green, and its connections.
-
One side of the trailer out: this is almost always a ground problem on that side, since the light may be trying to ground through its mounting bolts.
-
Dim or flickering lights: again a poor ground, or a corroded connection somewhere in the run.
Why Grounding Causes Most Failures
If you take one troubleshooting lesson from this guide, make it this: the white ground wire is the single most common cause of trailer light problems. When a light has a poor ground, the electricity tries to return through whatever path it can find, which produces the classic symptoms of dim or flickering lights, lights that come on when they should not, or one side of the trailer going dark.
The fix is straightforward. The ground wire must make solid contact with bare metal on both the tow vehicle and the trailer frame. Scrape away paint, rust and coating down to clean metal, use a star washer to bite into the surface, and seal the connection with dielectric grease. A good ground repairs more trailer light faults than any bulb or fuse, so check it first when something stops working.
Beating Saltwater Corrosion
Saltwater is relentless, but a few habits will keep your lights and wiring working for years.
-
Rinse the whole trailer with fresh water after every saltwater launch, paying attention to the lights, the connector and the wiring runs.
-
Use sealed LED lights and sealed, corrosion-resistant connectors so water has nowhere to get in.
-
Pack the trailer connector with dielectric grease to keep moisture out of the pins.
-
Route and secure wiring so it drains rather than trapping water in low loops or fittings.
-
Carry a spare sealed light or a bulb and fuse, so a failure at the ramp does not end your trip.
Your Pre-Launch and Pre-Tow Checklist

Run through this quick list before every trip and you will catch most trailer light problems in the driveway instead of at the ramp.
-
Test all functions with the trailer connected: running lights, brake lights, and left and right turn signals.
-
Inspect the connector for corrosion and bent pins, and pack it with dielectric grease.
-
Check that grounds are clean and tight on both the vehicle and the trailer.
-
Look over the wiring for chafe, especially where it crosses the frame or tongue.
-
Carry a spare sealed light, or a bulb and a fuse.
-
With sealed LED lights you can back straight in. If you still run incandescent lamps, unplug the connector before the lights hit the water to avoid cracking a hot bulb.
Before your next tow, walk the trailer, test every function and confirm the lights are legal and working. When you are ready to upgrade to sealed LED, the full selection is in the trailer lights collection at Go2Marine. And while you are giving the trailer a once-over, it is a good time to inspect the trailer roller guides that support your hull, so the whole rig is ready for the season.